
Lesson 3 · Deliverables
Documents, Data Displays & Decks
Convert a file, build a presentation and webpage, then reuse the design with new content.
Input, processing, output
One of the most useful things you can do with AI is give it a file, ask it to do something with the contents, and get a different file back. That might mean extracting text or data from a photo, turning text into slides, or giving the same text a webpage layout. You choose the input, what AI should do, and the output you need.
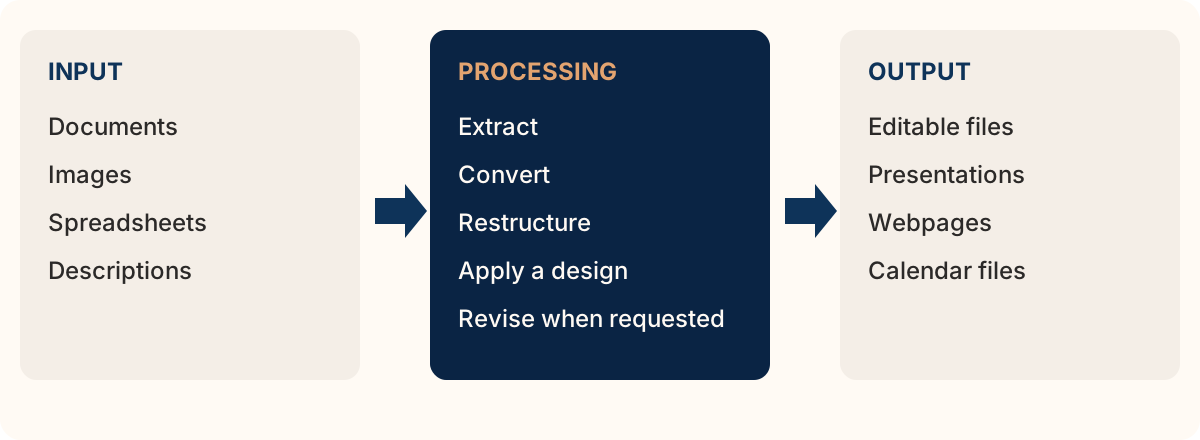
Start with four simple file conversions, then use the supplied templates and instructions to build a PowerPoint and a webpage. Work at your own pace; all files and prompts are provided below.
The examples can be done with a free or paid account of ChatGPT or Claude. Free accounts may require a pause when you reach an upload or usage limit.
Start Simple: 4 useful conversions
Open a new chat in Claude or ChatGPT for each conversion. Upload a file if required then paste the prompt. When the answer includes a file, use its download control to save it to your computer.
1. Non-fillable PDF form → fillable PDF
Download the sample PDF form, then attach it to your chat. It has blank spaces that would otherwise need to be completed by hand.
Make each blank entry in this form a fillable PDF field. Preserve the labels and layout. Give me the downloadable PDF.Open the downloaded result in a PDF viewer. Click a field, enter sample information, save the file and reopen it. Your entries should still be there. Open an example of the fillable file.
2. Description → calendar file
An .ics file contains an event that a calendar application like Outlook can import. The following is a practice description; change the details if you want to use a real event.
Create a downloadable .ics file for an event called "Weekly supervisor meeting". It takes place every Friday from October 23 through November 27, 2026, inclusive, from 1:00 to 1:30 p.m. in room S100. Use the Vancouver time zone. If there is a detail you need, ask me for it, do not make anything up.Preview the event in your calendar before saving it. Check its time, location and last occurrence. Importing this example adds events to your own calendar; it does not send anyone a meeting request.
3. Image → editable text
Use the sample handwritten notes (PNG), which contain fictional practice text, or photograph or screenshot text you are permitted to use.
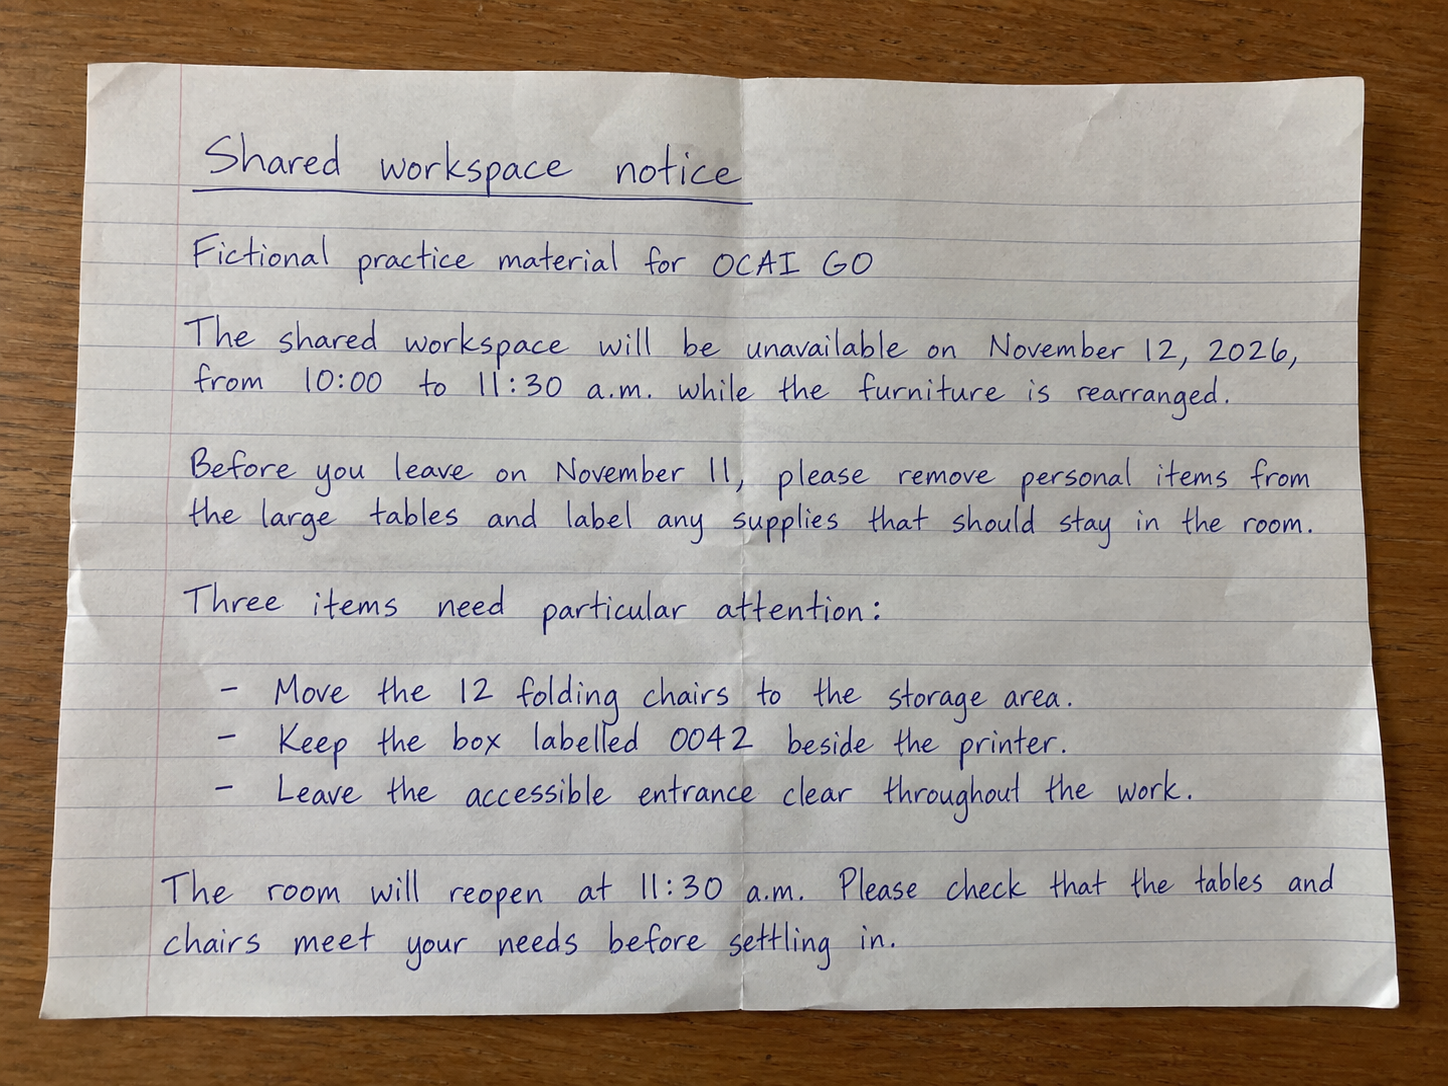
Attach the image and ask:
Transcribe this image into a downloadable Word document. Preserve the wording and order. Mark unclear text rather than guessing.Open the Word document and compare it with the image, especially names, numbers and anything marked unclear.
Download an example Word output (DOCX) to compare with the sample image.
4. Image of a table → spreadsheet
A hardcopy report contains the numbers you need. Take a picture of the table and turn that picture into an Excel file.
Use the sample report table image (PNG), which shows energy consumption in the fictional Greenfield City by sector and source, or use your own table image. Attach your chosen image and use the prompt below.
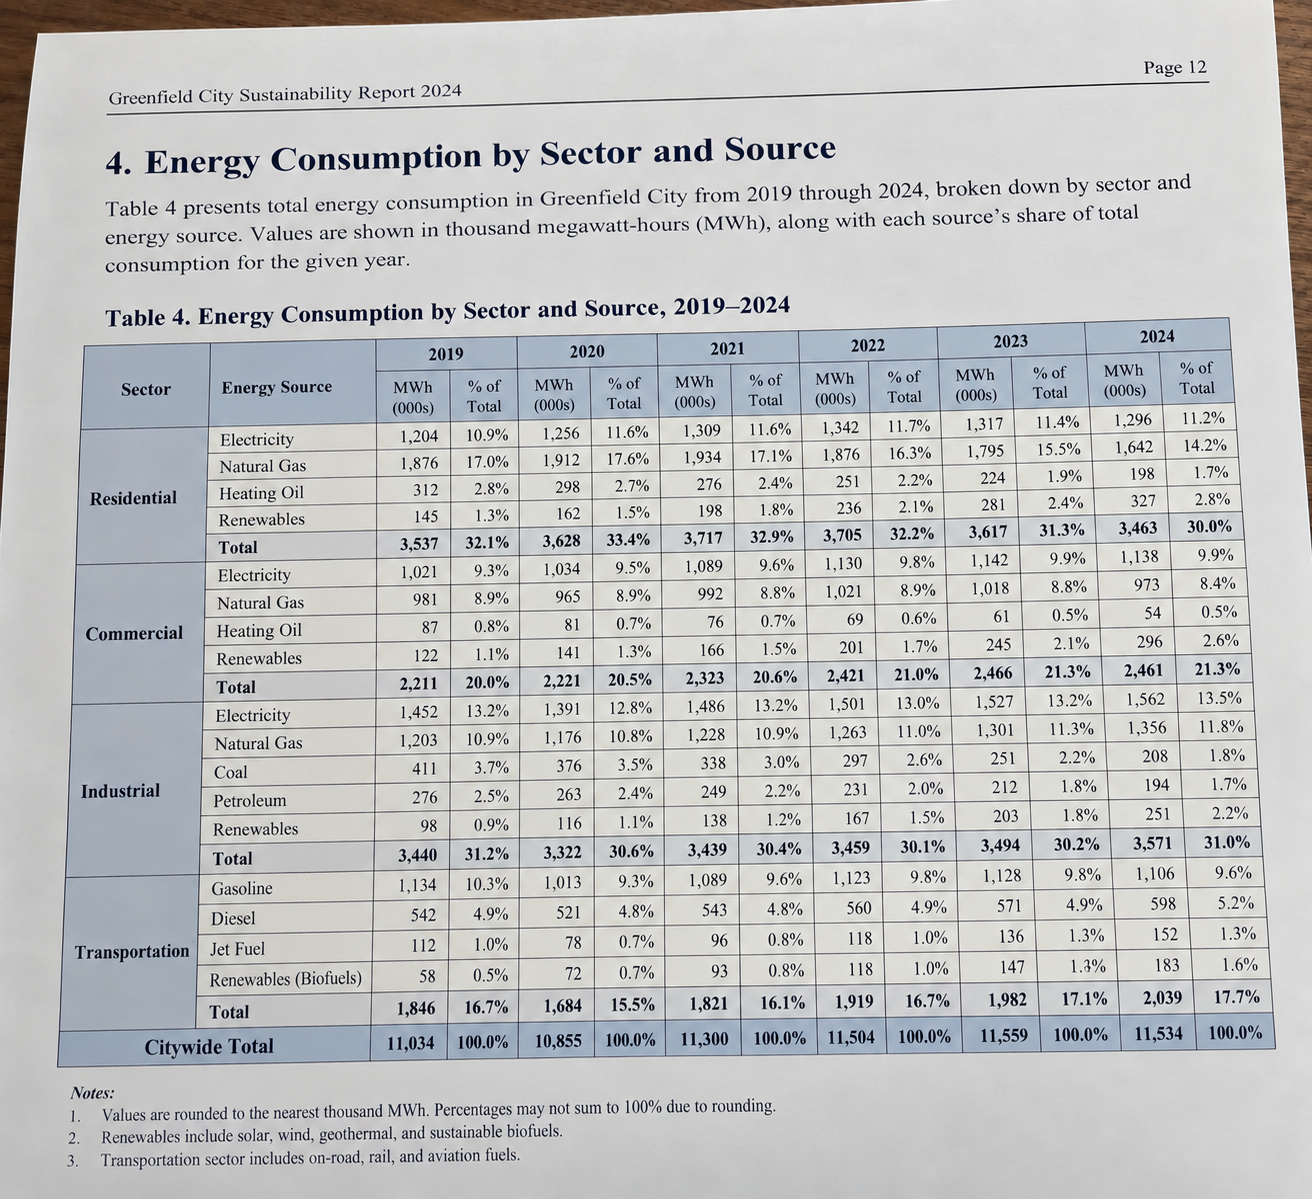
Convert the table in this picture into a downloadable Excel spreadsheet. Preserve the rows, columns, headings and values. Make numerical values usable in calculations, keep leading zeros in identifiers, and flag uncertain cells.Open the spreadsheet and double check the data against the picture. The result should be usable data, with each value in the right place. After confirming the values are correct, you can ask AI to turn the data into a chart or another useful display.
Download the example spreadsheet (XLSX).
Try another conversion from your own work, or ask AI for ideas.
One Word document, two finished formats
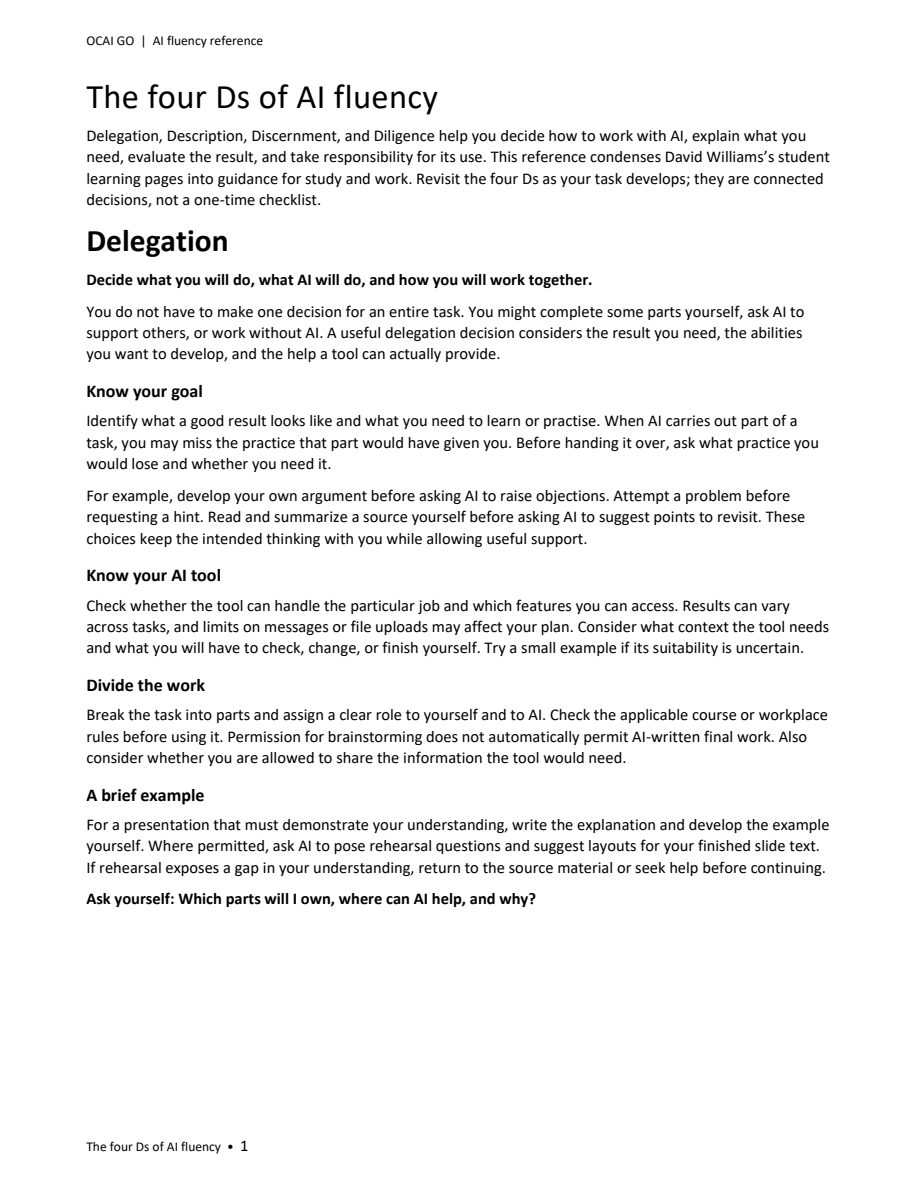
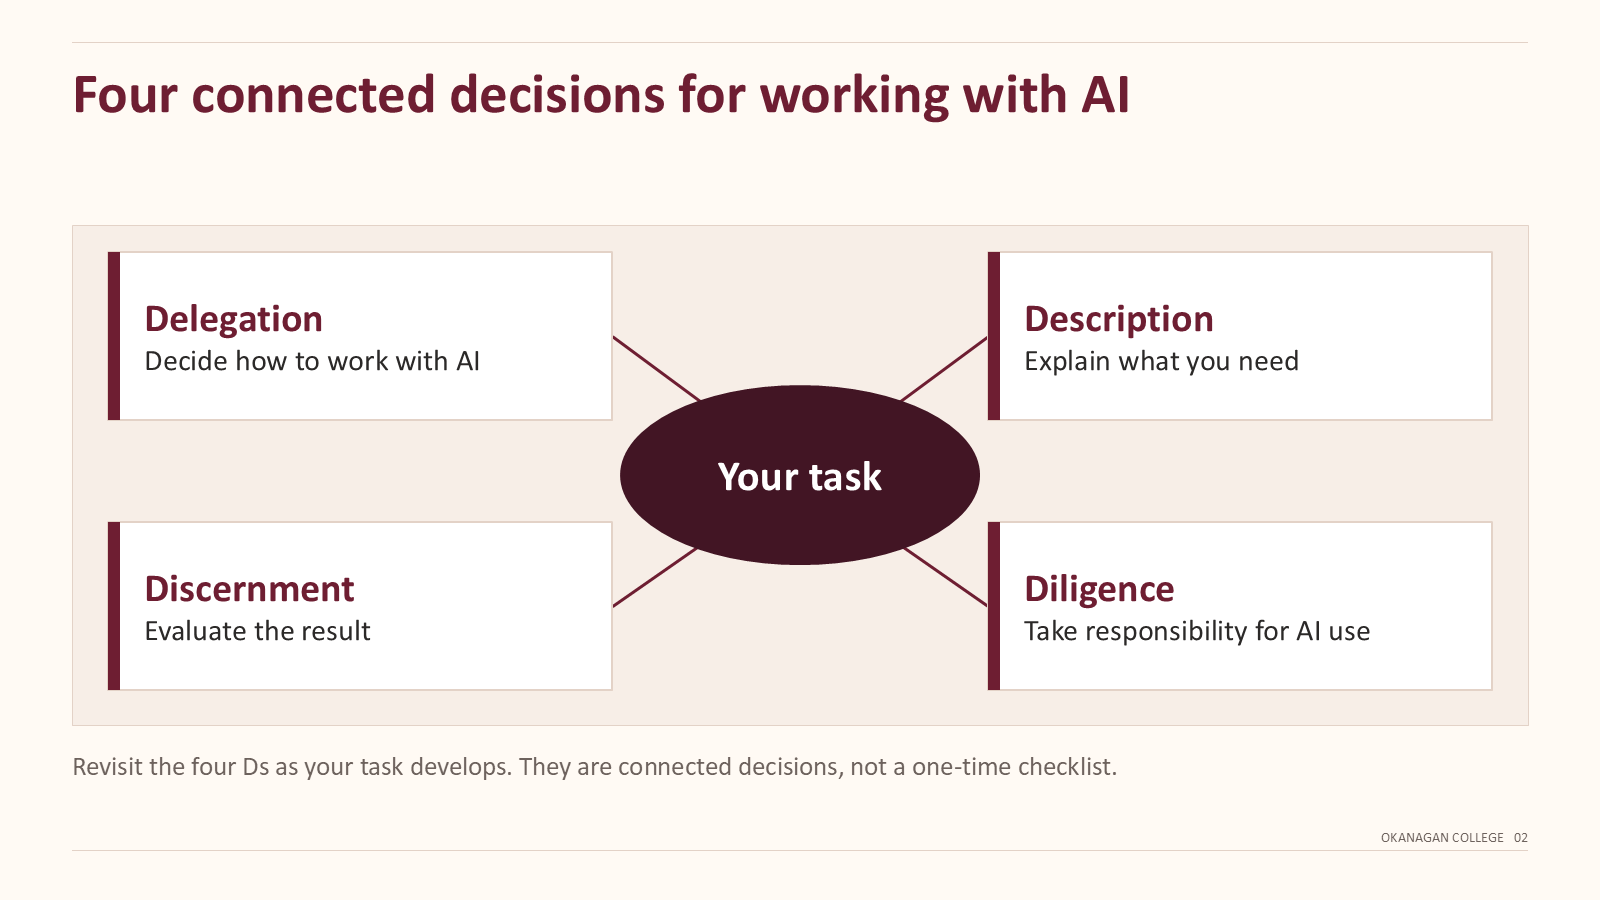
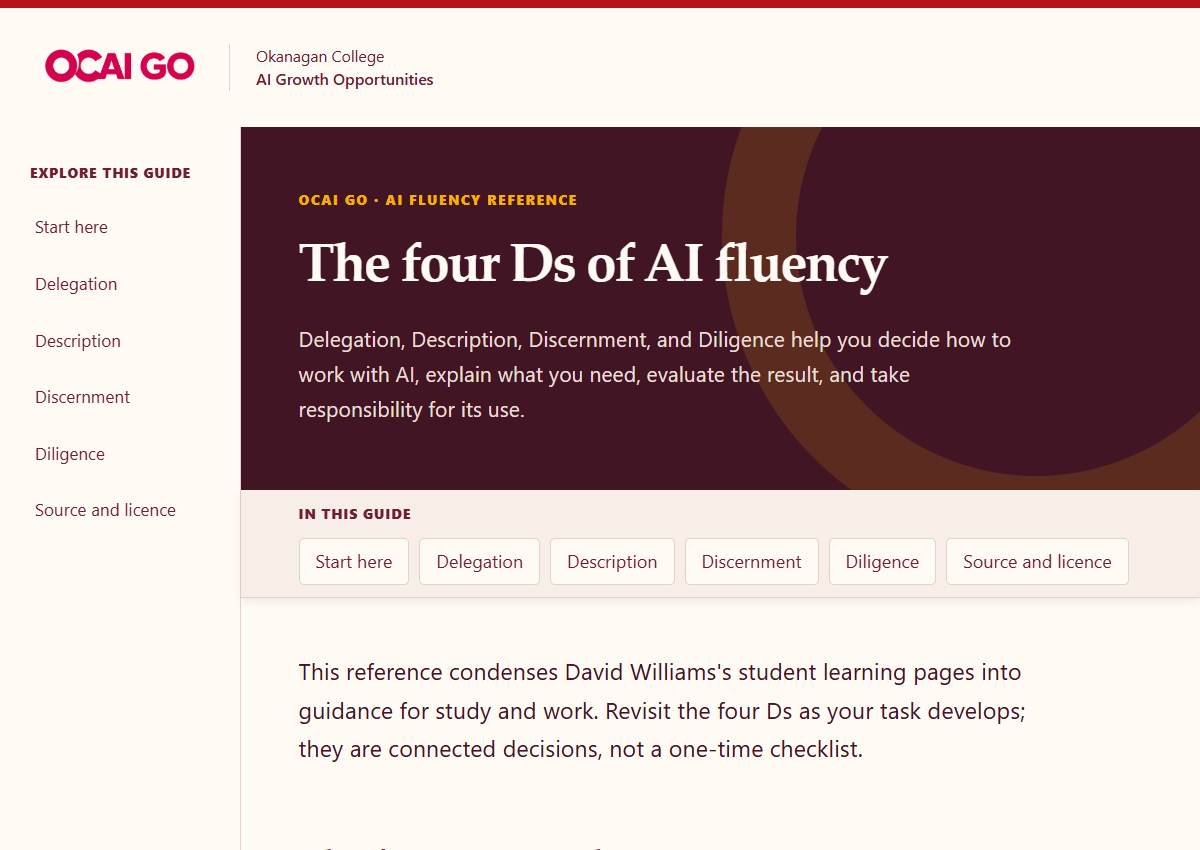
Start with one Word document and turn it into a PowerPoint presentation (with content condensed into slides and speaker notes) and a webpage (preserving content while changing the layout and navigation). The examples below show what you’ll build in the next two sections, using the supplied templates and design rules. Both examples were made with Claude.
Source: Word document
The four Ds of AI fluency.
Output 1: PowerPoint
Output 2: Webpage
Build the PowerPoint using the supplied files
Use Claude or ChatGPT. A Project keeps the template and instructions available for each new presentation you make.
1. Download the PowerPoint files
Save these in a folder called Presentation design:
- PowerPoint template — editable PPTX: contains the slide layouts and editable examples.
- PowerPoint design rules: describes the design and how to arrange the content.
- PowerPoint Project instructions: tells AI how to use the other files.
Read the rules and instructions if you wish, but you do not need to edit them for this exercise.
2. Choose a Project or regular chat for the PowerPoint
New to Projects? See Lesson 2 — Projects and Notebooks.
Open the guide for your tool below.
3. Ask for a PowerPoint plan
- Download the AI Fluency Word document or choose your own source document
- Start a chat inside the Presentation builder project, or continue in your regular chat. Attach your Word source using the attachment control beside the message box or by dragging it into the chat window.
- Copy and paste the instruction below into the chat. For your own source, change the audience and purpose before sending.
Follow the supplied Project instructions, design rules and template reference to turn the attached Word document into a short PowerPoint for my organization. Its purpose is to explain all four Ds of AI fluency. Use concise wording on the slides and put supporting explanation in speaker notes. Keep the facts, source credits and licence. Show me a slide plan before creating the file.Read the plan, identify anything you would like to change and then tell the AI about it. When you're satisfied, continue to step 4.
4. Create and download the presentation
Create the PowerPoint from this plan. Make slide text editable and put supporting explanation in actual speaker notes. Follow the supplied design, check the result, and give me the downloadable PPTX file.Save the file to your computer and open it in PowerPoint or your usual presentation application.
5. Check and revise the PowerPoint
Look through the slides. Is the content right, and can you read it comfortably? Try editing some text. Open the Notes area to see the supporting explanation. Keep the source credit and licence with the presentation.
If something minor needs changing, do it yourself. If you need to change something major (logo on page, a colour, the whole colour palette) ask the AI. For example:
Update the attached PowerPoint by [describe the change]. Apply the change consistently throughout the presentation. Preserve the wording, speaker notes and other formatting. Give me the revised, editable PowerPoint file.Download the revised version and check the change.
Note: if you are using a free version of ChatGPT or Claude, you will not be able to do much back and forth editing, but the first draft of the slide deck is a good starting point for you to build on.
Build the webpage using the supplied files
Use the original Word document again. This time, ask AI to preserve the complete content and apply the supplied webpage design.
1. Download the webpage files
Save these in a folder called Webpage design (keep original file extensions):
- Webpage template — HTML file: contains the page design, images and working controls.
- Website design rules: describes the layout and how to handle the content.
- Website Project instructions: tells AI how to use the other files.
Read the rules and instructions if you wish, but you do not need to edit them for this exercise.
2. Choose a Project or regular chat for the webpage
New to Projects? See Lesson 2 — Projects and Notebooks.
Open the guide for your tool below.
3. Ask for a webpage plan
Download the four-D Word document or choose your own source document.
- Start a chat inside the Webpage builder project, or continue in your regular chat. Attach your original Word source using the attachment control beside the message box.
- Copy and paste the instruction below into the chat.
Follow the supplied Project instructions, website design rules and template to turn the attached Word document into a webpage. Preserve all the source wording, headings, facts, credits and licence. Change the layout and navigation, not the writing. Show me the section plan before creating the file.Read the plan and make sure it is what you want. Ask for changes if needed. When you're satisfied, continue to step 4.
4. Create and download the webpage
Create the webpage from this plan. Use the supplied template and keep the source wording intact. Put the design, controls and template images inside one HTML file. Check the result and give me the downloadable HTML file.An HTML file is a webpage you can save on your computer. Download it, then double-click it to open it in your browser.
5. Check and revise the webpage
Read through the page alongside the source. Is the content complete and easy to read? Try the section links and narrow the browser window to see how the page fits a smaller screen.
If something needs changing, describe it. For example:
The two-column section is cramped. Make that section a single column while preserving all its wording and the rest of the page. Give me the revised HTML file.Download and open the revised file. Opening a file on your computer does not publish it online. You can share the HTML file itself, or upload it through your usual course or website process when you are ready.
Note: You can use HTML files as content pages in Brightspace.
Look at what you made
Open your presentation and webpage. What works well? What would you change? You can ask someone else to look at the files, or share one useful result and one thing you corrected.
Think of a document you work with repeatedly: a monthly update, student project report, procedure guide or event briefing. Which format would help its audience? What design decisions could you keep for the next version?
What would have helped you most? A feedback address at okaigo.ca is coming soon.
Coming next: create your own template
Try your own content and experiment with changes to the supplied design.
Lesson 4 explores creating your own template and conversion instructions. You can work on a webpage design or a PowerPoint design, starting from an idea or an example you like.
Notice what you would want to keep or change in the supplied design. Save a webpage or presentation you like, and choose a short piece of your own content to use. Use AI to help describe the design, build a sample, then test and refine it.
Lesson 5 then explores Skills: another way to save instructions for a repeatable task.